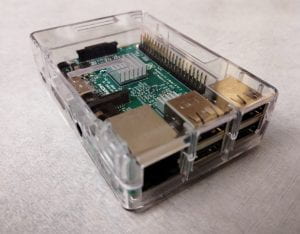
 This guide will show you to how to connect a Raspberry Pi to the UCSC eduroam WiFi.

Note that you will need to save your username (cruzid) and password (blue password) in clear text in a configuration file. It is strongly recommended that you secure your device with a strong username and password.
This procedure has been tested on Raspbian Stretch Lite version April 2019.
After you have imaged and loaded the linux system to the Raspberry Pi do:
-
- Log in to your Raspberry Pi and elevate to superuser mode:
-
sudo su
-
- Shutdown all networking interfaces:
-
ifdown wlan0
-
ifdown eth0
-
- Then, kill any processes associated with wpa_supplicant :
-
killall wpa_supplicant
-
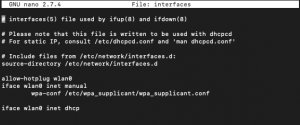
- Now that the network interfaces and processes are disabled, we can modify configuration files. Use a text editor on the Raspberry Pi to open the /etc/network/interfaces file. In this case I will use nano:
-
nano /etc/network/interfaces
-
- Next, add the following text to the interfaces file:
- Save and exit. If using nano:
- Press ctrl+x, then ‘y’, then Enter.
- The Previous step tells the Linux system how to connect to the network, in this case is directing it to use the configuration settings in wpa_supplicant (not configured yet) for interface wlan0 (default WiFi interface).
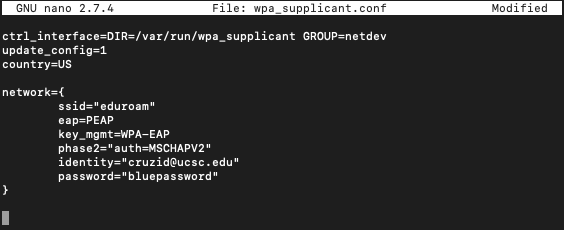
- Now, we can edit the wpa_supplicant file to enter the exact configuration parameters to connect to eduroam. First open /etc/wpa_supplicant/wpa_supplicant.conf using a text editor:
-
nano /etc/wpa_supplicant/wpa_supplicant.conf
-
- Then, enter the following lines of text exactly as it appears below, for exception of the last 2 lines. If you are a affiliated with UCSC, use your cruzid and blue password. Make sure to enclose your username and password with double quotes as shown.

- Double check to make sure everything looks correct. Then save and exit.
- Optional: Run the following command to test the settings you entered above. If successful, you will see a message “Authentication Succeeded” somewhere in the output.
-
wpa_supplicant -i wlan0 -c /etc/wpa_supplicant/wpa_supplicant.conf
- After a little while the output will hang, check the output for the “authentication successful”
- Force terminate using ctrl+c
-
- Now bring the network interfaces back online:
-
ifup wlan0
-
ifup eth0
-
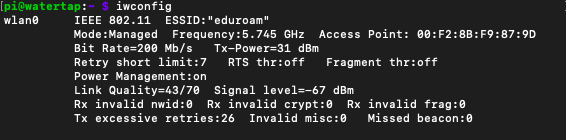
- If no errors shown in the last step, run the following commands to get network information. You should see an IPv4 address like the screenshots below:
-
ifconfig wlan0
-
- Log in to your Raspberry Pi and elevate to superuser mode:


-
-
-
iwconfig
-
-
-
- Finally, test network connectivity:
-
ping -c 3 www.google.com
-
- If you received any ping responses, Congratulations you are Done!
- Finally, test network connectivity:
A few Trobleshooting tips:
Make sure you can reboot the raspberry pi and connect to the network automatically, sometimes it take a few seconds. However if you see any dhcp failures during bootup, then run the following command:
-
-
sudo dhclient wlan0
-
If you have any issues connecting, make sure you have set the system locality to your region. To do so, run:
-
-
sudo raspi-config
- select option 4 “Localisation Options” and set the proper options for your:
- Locale
- Timezone
- Keyboard
- Wif-fi Country
-